

The Moroccan Zellige: Secrets of the Ancient Craft
- Moroccan Crafts Pottery & Zellige
 Maroc Fans
- 0
- 19 minutes read

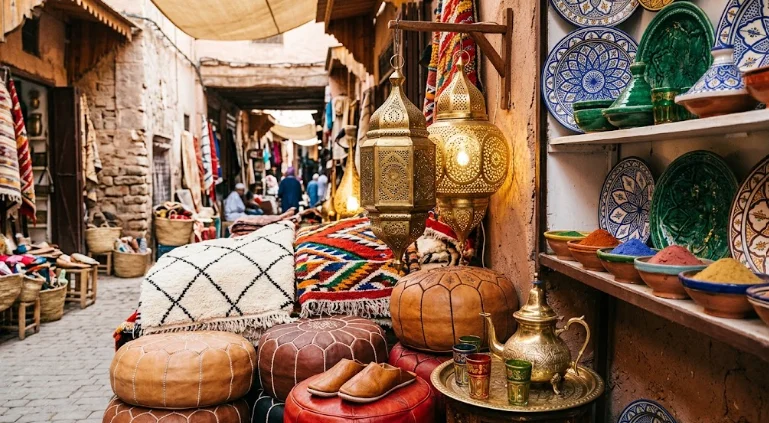
If you have ever stepped inside a Moroccan riad, you have likely marveled at the historic palaces of Marrakech. You might have also admired a vibrant mosaic fountain in a bustling medina. If so, you have witnessed the magic of The Moroccan Zellige. These small, glazed terracotta tiles shimmer beautifully under the light. They create an artistic patchwork where no two pieces are exactly identical.
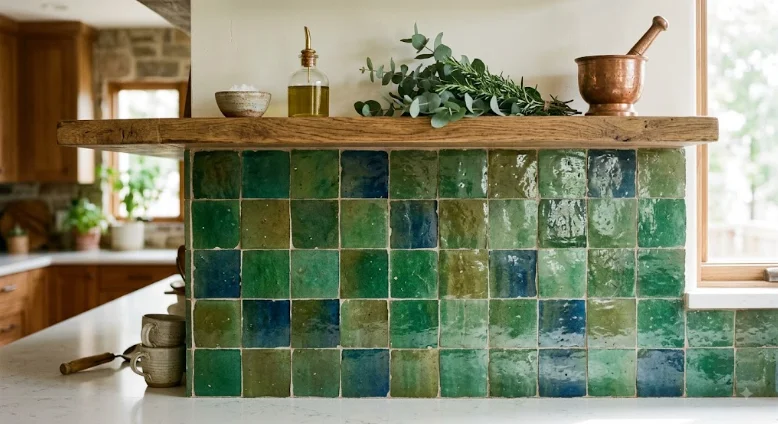
Today, this ancient art form has taken the global interior design world by storm. Modern homeowners and designers love it for its “perfect imperfections”. These include subtle variations in shade, irregular edges, and uneven surfaces that reflect light like water. However, true tilework of this caliber is not an industrial factory product. The Moroccan Zellige remains a living heritage. It is handcrafted in North Africa using techniques unchanged since the 10th century.
In this comprehensive guide, we will take a deep dive behind the scenes. We will explore the ancient, meticulous process of how The Moroccan Zellige is made. Let’s follow the extraordinary journey from raw earth to breathtaking architectural masterpieces.
What is Authentic Artistry Behind The Moroccan Zellige?
Before diving into the production steps, it helps to understand what defines this genuine art. The word Zellige comes from the Arabic word al-zulaycha, meaning “little polished stone”.
Unlike mass-produced ceramic tiles, The Moroccan Zellige is made entirely by hand. Artisans utilize unrefined natural clay sourced primarily from the city of Fez. The authentic craft relies on a collective of highly skilled local artisans. These experts include Maallems (master craftsmen), Rasham (designers), and Naqqash (tile cutters). This art form is deeply integrated into the local culture. To learn more, be sure to read our comprehensive guide on The History and Cultural Significance of Moroccan Mosaic Art.
The 7 Traditional Steps of Creating The Moroccan Zellige
Step 1: Gathering and Preparing the Special Clay of Fez
The entire journey of The Moroccan Zellige begins with the earth. Authentic production requires a very specific type of clay. Artisans find this unrefined, greyish-white clay only in the hills surrounding Fez. This clay is uniquely rich and malleable. It holds together perfectly during the delicate firing processes.
- Soaking: Artisans harvest the raw clay blocks and transport them to traditional open-air workshops. They break them down and submerge them in large, water-filled pits for at least 48 hours.
- Purifying: Once the clay softens into a slurry, artisans meticulously knead and filter it by hand. This process removes small stones, twigs, or air pockets.
- Kneading: Just like baker’s dough, the clay is stomped on and kneaded repeatedly. This continues until it reaches a perfectly smooth, uniform texture.
Step 2: Hand-Shaping and Sun-Drying the Slabs
Once the clay is ready, it is time to shape the raw foundation tiles. Artisans traditionally refer to these as ferrach or rough slabs. They form the structural base of The Moroccan Zellige.
Artisans press the moist clay into square wooden molds. These molds typically measure about 10×10 cm or 12×12 cm. They flatten the top surfaces with their hands and smooth them out using a simple wooden trowel.
After molding, the wet tiles are laid flat on the ground under the intense Moroccan sun. Artisans flip them regularly to ensure they dry completely and evenly on both sides. This slow, sun-baking process hardens the raw clay naturally. It removes excess moisture so the tiles do not warp or crack later inside the fiery kiln.
Step 3: The First Firing (The Biscuit Stage)
Once thoroughly dried by the sun, the raw clay slabs are carefully moved to traditional kilns. These beehive-shaped masonry kilns are architectural marvels in their own right. Historically, artisans fueled them by burning olive pits, wood chips, or crushed almond shells.
The tiles are stacked strategically inside the oven. The heat distribution inside these wood-fired ovens is naturally uneven. This variation actually works to the artisan’s advantage. The temperature shifts give The Moroccan Zellige its distinct, primitive density and subtle structural quirks.
Following this first firing, the tiles undergo a massive transformation. They change from a dull grey clay to a warm, porous terracotta material known as biscuit (or bejmat).
Step 4: Applying Vibrant Glazes to The Moroccan Zellige
The biscuit tiles are now ready to receive their signature, glass-like coats of color. The iconic palette of The Moroccan Zellige relies on traditional glazes. Artisans mix them using natural mineral pigments used for hundreds of years:
- Cobalt yields deep, royal blues.
- Copper yields striking, vivid greens.
- Iron produces warm yellows and ambers.
- Manganese yields deep browns and blacks.
- Tin creates a clean, classic white.
Artisans pour or brush the glaze onto the smooth side of the biscuit tiles by hand. Because the application is manual, the thickness varies ever so slightly across each individual piece. If you want to learn more about how these colors define local architecture, check out our piece on Traditional Moroccan Architecture: Elements of the Iconic Riad.
Step 5: The Second Kiln Firing
The glazed tiles return to the kiln for a second, highly precise round of firing. This critical step locks in the beauty of The Moroccan Zellige. This time, the intense heat melts the mineral powders into a smooth, glossy enamel coating.
[Raw Clay Layer] ---> [Sun Drying] ---> [First Kiln Firing (Biscuit)] ---> [Mineral Glazing] ---> [Second Kiln Firing]
Inside the multi-tiered kiln, the tiles placed at the very top receive the most direct heat. This leads to deeper, highly saturated colors. Meanwhile, tiles near the bottom receive less heat, resulting in lighter shades. This beautifully organic baking process explains why a single batch of green tiles features dozens of varying undertones. You will see everything from soft olive to vivid emerald.
Step 6: Hand-Cutting (The Art of Taqtî’i)
Once the second firing is complete and the tiles have cooled, they travel to the cutting workshop. This is where the true mathematical wizardry of The Moroccan Zellige comes alive.
| THE THREE STAGES OF CUTTING | |
| 1. The Rasham | Draws the geometric outline on the glazed tile using a stencil. |
| 2. The Naqqash | Hand-chisels the rough shape using a heavy ‘menkach’ hammer. |
| 3. The Khalias | Files down the back edges to create a clean, beveled angle. |
First, an artisan called a Rasham uses a stencil and a fine tool. They trace intricate geometric shapes onto the glazed surface of the tile. These shapes include squares, stars, triangles, diamonds, and complex polygons known as furmah.
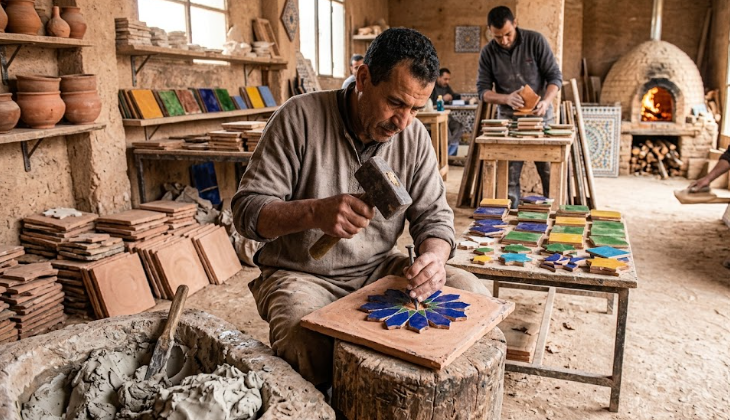
Next, the Naqqash (tile cutter) takes over. Armed with a menkach, a heavy, sharp-edged iron hammer, the artisan precisely strikes the tile along the drawn lines. With unmatched accuracy, they chip away the excess terracotta. They do this without shattering the delicate glass glaze.
Finally, the Khalias trims and files down the raw back edges of each cut shape. They cut at a sharp, inward angle. This beveled edge is crucial because it allows The Moroccan Zellige to be fitted tightly together during installation. This results in virtually no visible grout lines.
Step 7: Assembly and Grouting
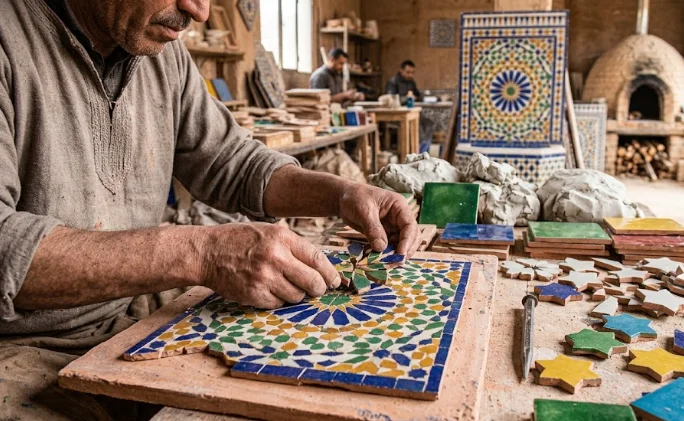
The final phase depends on how The Moroccan Zellige will be used. If clients buy it as loose tiling, artisans pack it carefully for transport. However, for intricate geometric medallions, fountains, or table tops, the Maallem pre-assembles the mosaic panel directly in the workshop.
- Layout Face-Down: The pieces are placed face-down on a flat floor. The glazed side remains hidden against the ground. Therefore, the artisan must assemble the complex geometric pattern entirely from memory based on the shapes of the tile backings!
- Pouring the Mortar: Once the puzzle is perfectly laid out, artisans pour a mixture of liquid plaster and mortar over the back of the tiles. This binds them together into a singular, solid panel.
- The Reveal: After the mortar cures, the entire mosaic sheet is flipped over. This reveals the flawless, shimmering, flat geometric surface on the front.
How to Spot Fake vs. Authentic The Moroccan Zellige
Because The Moroccan Zellige has become incredibly popular, many large commercial factories manufacture imitation ceramic tiles. If you are shopping for your home, look out for these distinct indicators:
- Edge Cuts: Real tilework features hand-beveled edges with slight irregularities. Factory imitations of The Moroccan Zellige have uniform, perfectly square machine-stamped edges.
- Color Uniformity: If every single tile in a box features the exact same shade, it is synthetic. Authentic tilework always displays a distinct mix of surface depths, pit marks, and shade variations.
- The Backing: The back of authentic pieces consists of rough, hand-kneaded terracotta clay. It often bears faint finger impressions or marks from the artisan’s wooden mold.
- The Certification Label: Genuinely sourced tiles are backed by official geographical designations. Look for the Zellige de Fès quality label to prove you bought true The Moroccan Zellige.
To see beautiful examples of authentic tiles applied across spaces, head over to our feature covering Moroccan Interior Design: Bring Medina Vibes Into Your Home.
Conclusion: A Labor of Love and Culture
Authentic The Moroccan Zellige is far more than a decorative wall covering. It is a labor-intensive art form that honors human patience, geometric mathematical genius, and natural elements. Every single tile tells a unique story of an artisan’s dedicated touch. It successfully preserves a thousand-year-old heritage that brings unparalleled character, warmth, and soul to any space it adorns.
Frequently Asked Questions (FAQ)
1. Why is Fez the primary center for making The Moroccan Zellige?
The hills surrounding Fez contain a unique, light-grey natural clay. It possesses the perfect mineral composition, flexibility, and heat-resistant properties required for traditional kilns. This unique clay allows The Moroccan Zellige to handle hand-molding and sharp manual chiseling much better than other clays.
2. What causes the uneven color shades in the tiles?
The variations in color are caused by the traditional wood or olive-pit firing process. Temperatures shift throughout different areas of the ancient masonry kilns. Tiles placed near the top burn hotter and take on a deeper glaze finish than tiles located near the bottom.
3. Is The Moroccan Zellige tile difficult to maintain?
Because it has a glossy, glass-like enamel glaze on top, it is highly resistant to stains and water. This makes it easy to wipe down with mild soap and water. However, due to its slightly uneven layout and hand-cut edges, it requires a bit more care during deep cleaning than perfectly flat factory tiles.
4. Can these handmade tiles be used on floors?
Yes, The Moroccan Zellige can be used on floors. However, it is best suited for low-to-medium foot traffic areas, such as bathrooms or residential accent borders. For heavy-traffic flooring, traditional unglazed Moroccan terracotta tiles (bejmat) are preferred because they are thicker and less slippery.
5. Why are the mosaic pieces assembled face-down?
Artisans assemble custom mosaic panels face-down on a flat surface. This process guarantees that the final exposed front of the installation remains completely level and uniform. The clay backing of each handmade tile varies slightly in thickness. Assembling them face-down irons out these structural differences before the backing mortar is poured.
6. How long does it take to make a custom installation of The Moroccan Zellige?
Depending on the size of the project, handcrafting a custom order of The Moroccan Zellige can take anywhere from 2 to 8 weeks. Complexity also affects the timeline. Every single stage—from kneading the raw clay to hand-chiseling individual star pieces—is done entirely by hand.